Managing stores
Add, edit, reposition and delete stores directly on the map.
Once your data is on the map, you can add, edit, reposition and delete individual stores right there without re-uploading a file. Every change is written straight into the source dataset.
The detail panel — three modes
Everything you do with a store happens in the detail panel on the right. The panel title tells you which mode you are in:
| Title | Mode | Available buttons |
|---|---|---|
| Details | View only | ✏️ Edit · 🗑️ Delete · ✕ Close |
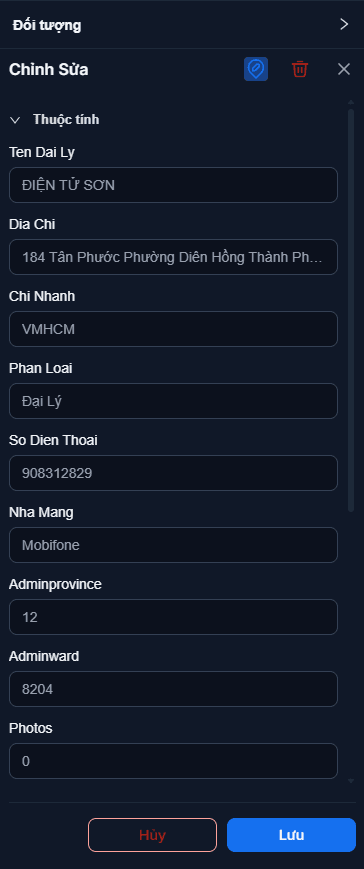
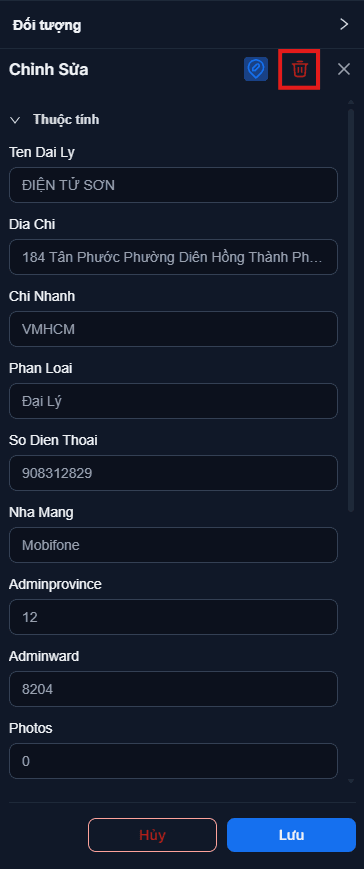
| Editing | Editing | 📍 Edit location · 🗑️ Delete · ✕ Close · Cancel / Save at the bottom |
| Add point | Creating | ✕ Close · Cancel / Save at the bottom |
The panel content is split into three sections: Attributes · Opening hours · Images.
Adding a store
There is exactly one way to add: the Add point button on the floating toolbar at the top-centre of the map. The detail panel cannot create stores — it works on existing ones.

-
Click Add point.
- The map has several layers → the button opens a layer list; pick the one to add to.
- The map has a single layer → you go straight into add mode, nothing to pick.
-
Click the map at the store's location.
-
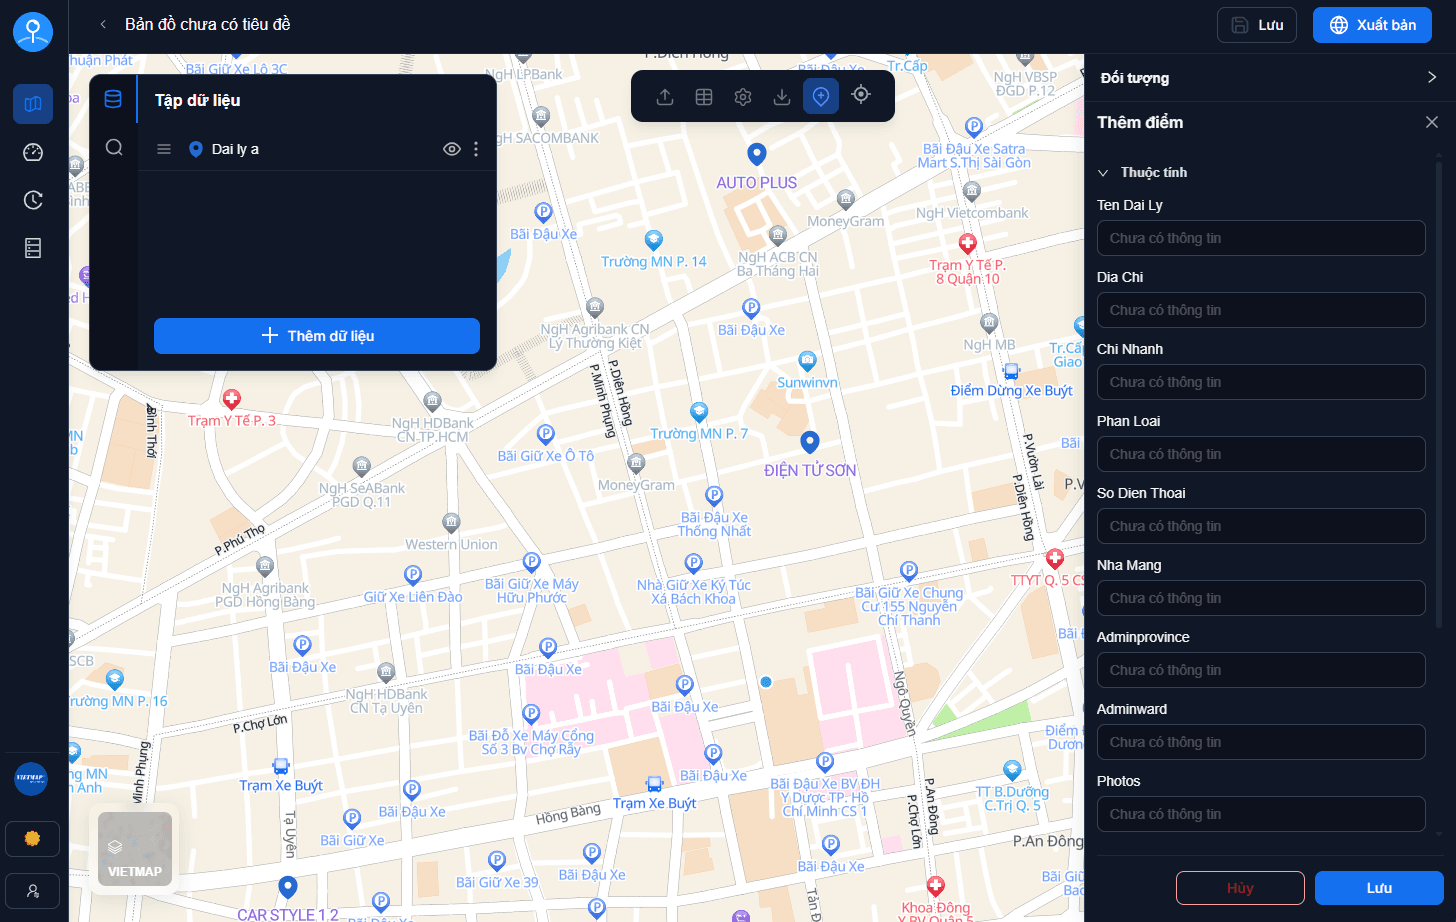
The detail panel opens in Add point mode — fill in name, address, phone… following the layer's fields.
-
Click Save. The new store appears on the map with the symbol you designed for the layer.
No need to pick a layer in the Legend first
The receiving layer is chosen on the Add point button itself, not beforehand in the Legend panel.
Images and opening hours cannot be entered while creating
The Images and Opening hours sections do not appear while adding a point — they need a saved store to attach to.
Not seeing an image field does not mean the layer lacks one, so do not rush off to create another column. Save the store first, reopen it and click Edit, and both sections appear.
Missing a field you need?
The fields you fill in are the columns of the dataset. To add a new one, see Managing structure.
Viewing and editing store details
Click a store on the map and the detail panel opens in Details mode with all of its fields and values.
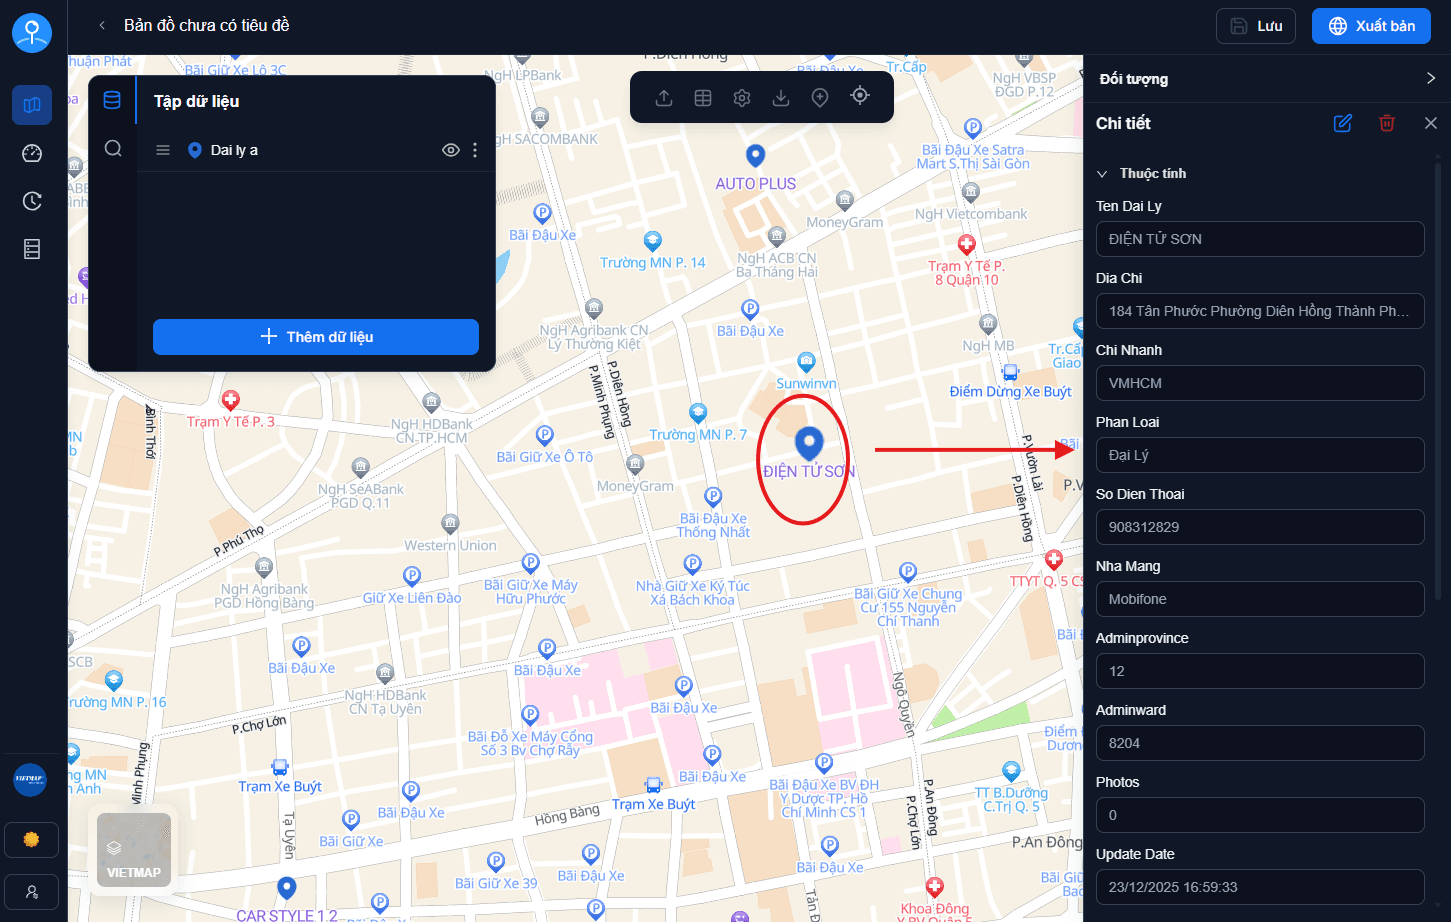
Click the pencil (Edit) icon at the top to switch to Editing mode, then click Save at the bottom when done (or Cancel to discard).
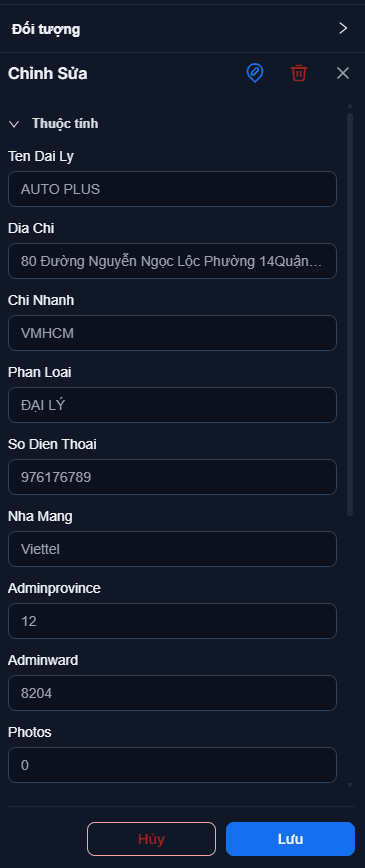
Some system fields disappear when you click Edit
Fields the system maintains itself — updated date, updated by, created date, ward code — are shown in Details mode but hidden in Editing mode. That is deliberate: the system writes them, you cannot change them, so there is no point offering an input box.
The id and the geometry (geom) are always hidden in both modes. To move a store use the Edit location button rather than typing coordinates.
Special field types
| Type | In Details mode | In Editing mode |
|---|---|---|
| Domain | Shows the readable label (not the code) | A searchable picker — you choose by label, it stores the code |
| Opening hours | A summary line with an open / closed status | Click it to open the hours editor |
| Images | The store's image strip | Add and remove images in place |
More on hours and images: Images & opening hours.
Moving a store
Position is changed by dragging on the map, not by typing coordinates.
- Click the store on the map to open the detail panel.
- Click pencil (Edit), then the pin (Edit location) icon.
- Drag the point to its new place.
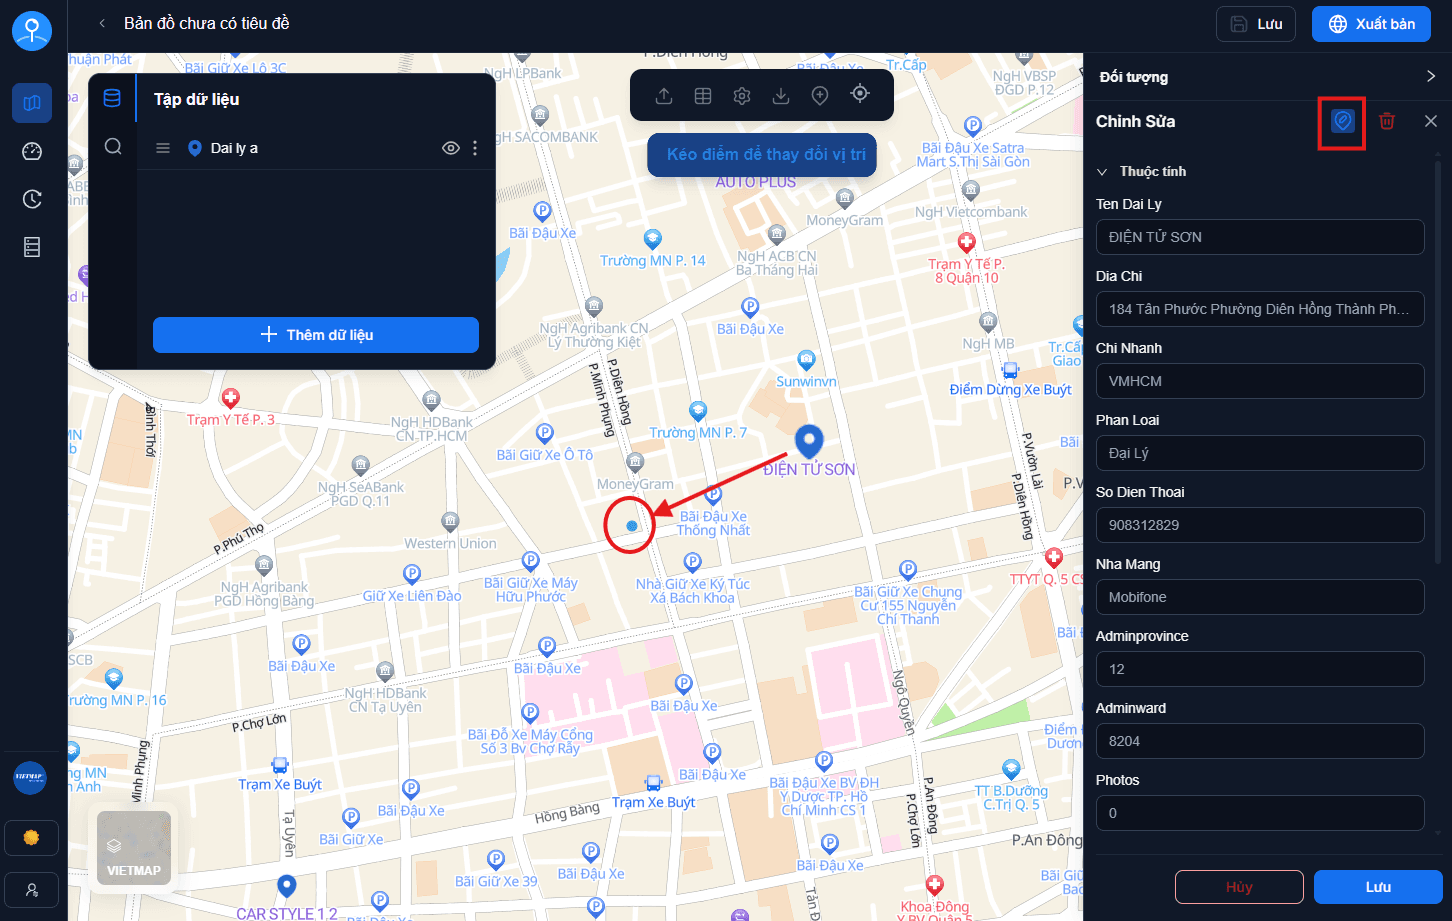
When you are done, click Save to record the change.
Undo a slip
Dragged to the wrong spot? Press Ctrl + Z to undo the last action.
Deleting a store
Open the store's detail panel and click the trash icon. The system asks for confirmation first.
Deleting removes it from the dataset
A deleted store is removed from the source dataset, meaning it disappears from every map using that dataset. This cannot be undone.
Editing many stores at once
When reviewing or looking up many records, working in the data table is faster than clicking point by point on the map — see Data table.
Saving is enough — no republish
Adding, editing, moving or deleting a store is a data change. A published map reads straight from the dataset, so clicking Save is all customers need — no republish required.
Only appearance changes — icons, colours, labels, popups, the basemap, which fields are exposed — require republishing. See Publishing & sharing.
Next: Data table — view and look up all of your stores as a table.