Publishing & sharing
Make your map public through a link or embed it into a website.
Once your map is ready, you publish it so customers can see it — through a link or embedded in a website. It only takes a few steps.
Before sharing: choose what information is shown
A shared map does not have to show every column of your data. Configure up front which fields customers see and how they look.
Open the settings panel either way — both lead to the same place:
- The Settings button on the floating toolbar at the top-centre of the map.
- Or a layer's three-dot menu in the legend → Settings.
In this mode the two buttons on the right of the toolbar change to Cancel and Save settings.
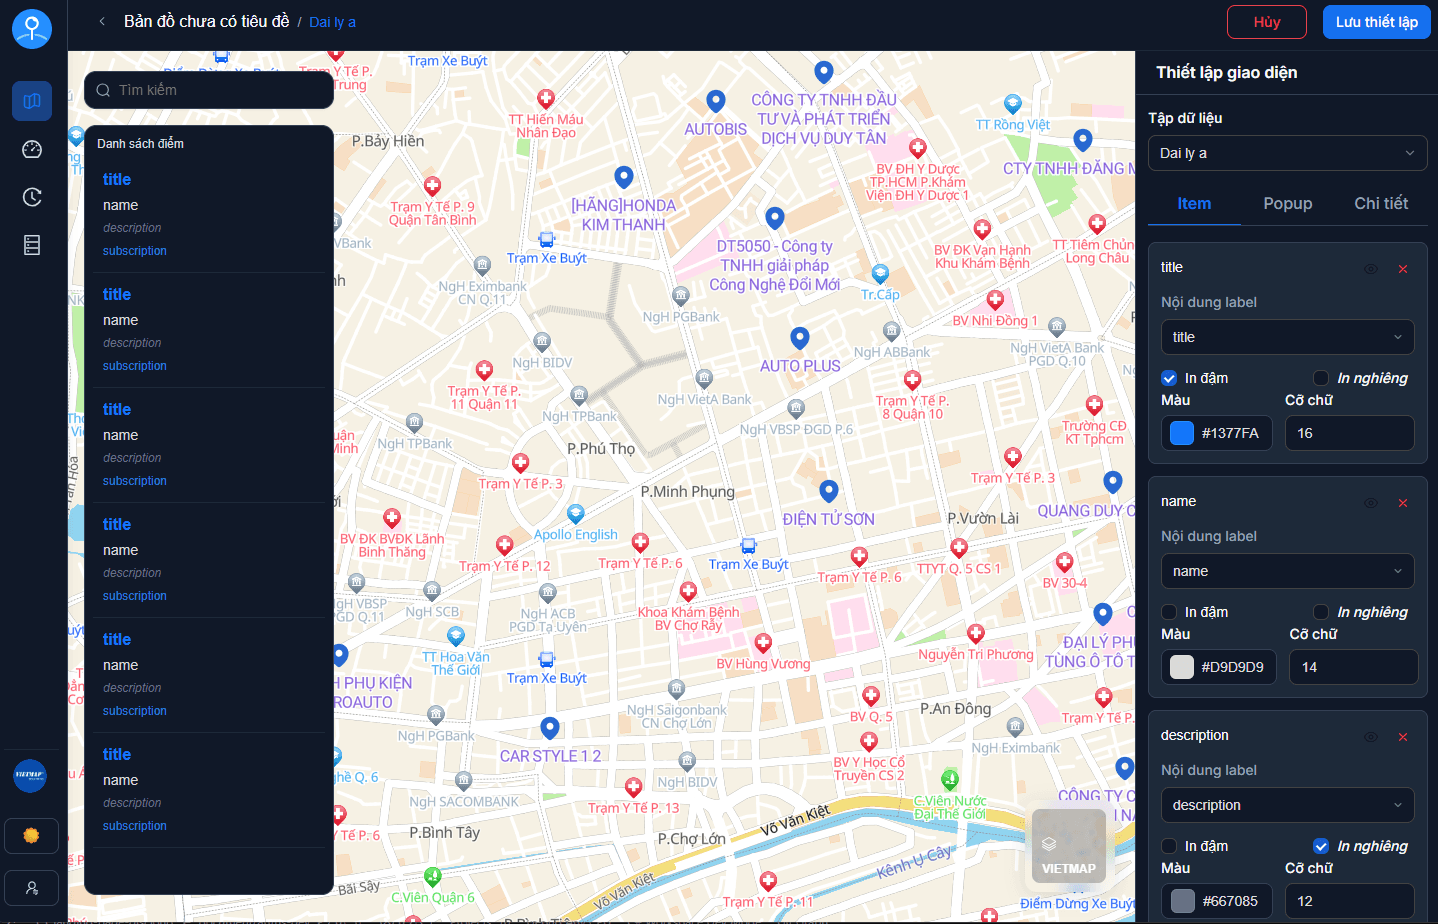
Three tabs for three places customers look
This is the part most often missed. The settings panel has three tabs, each configuring a different place:
| Tab | Configures | When customers see it |
|---|---|---|
| Item | One row in the list panel beside the map | As soon as the map opens, and when searching |
| Popup | The information bubble on the map itself | When they click a store |
| Detail | The full information card | When they open a store's details |
Configuring one tab is not enough
The three tabs are independent. Fill in only Item and publish, and customers clicking a store get an empty popup — and the popup is what they click most.
This is also why the Publish dialog sometimes blocks you with "has not been configured for detail display (Popup/List)". That message means a tab is still empty — click Set up in the dialog to jump straight to the layer that is missing one.
Adding and styling rows
Pick a dataset at the top of the panel — settings apply per dataset, so a map with several layers needs each one configured.
Click + Add row and a dialog lets you pick which field to show. Each row can have its own colour, text size and font.
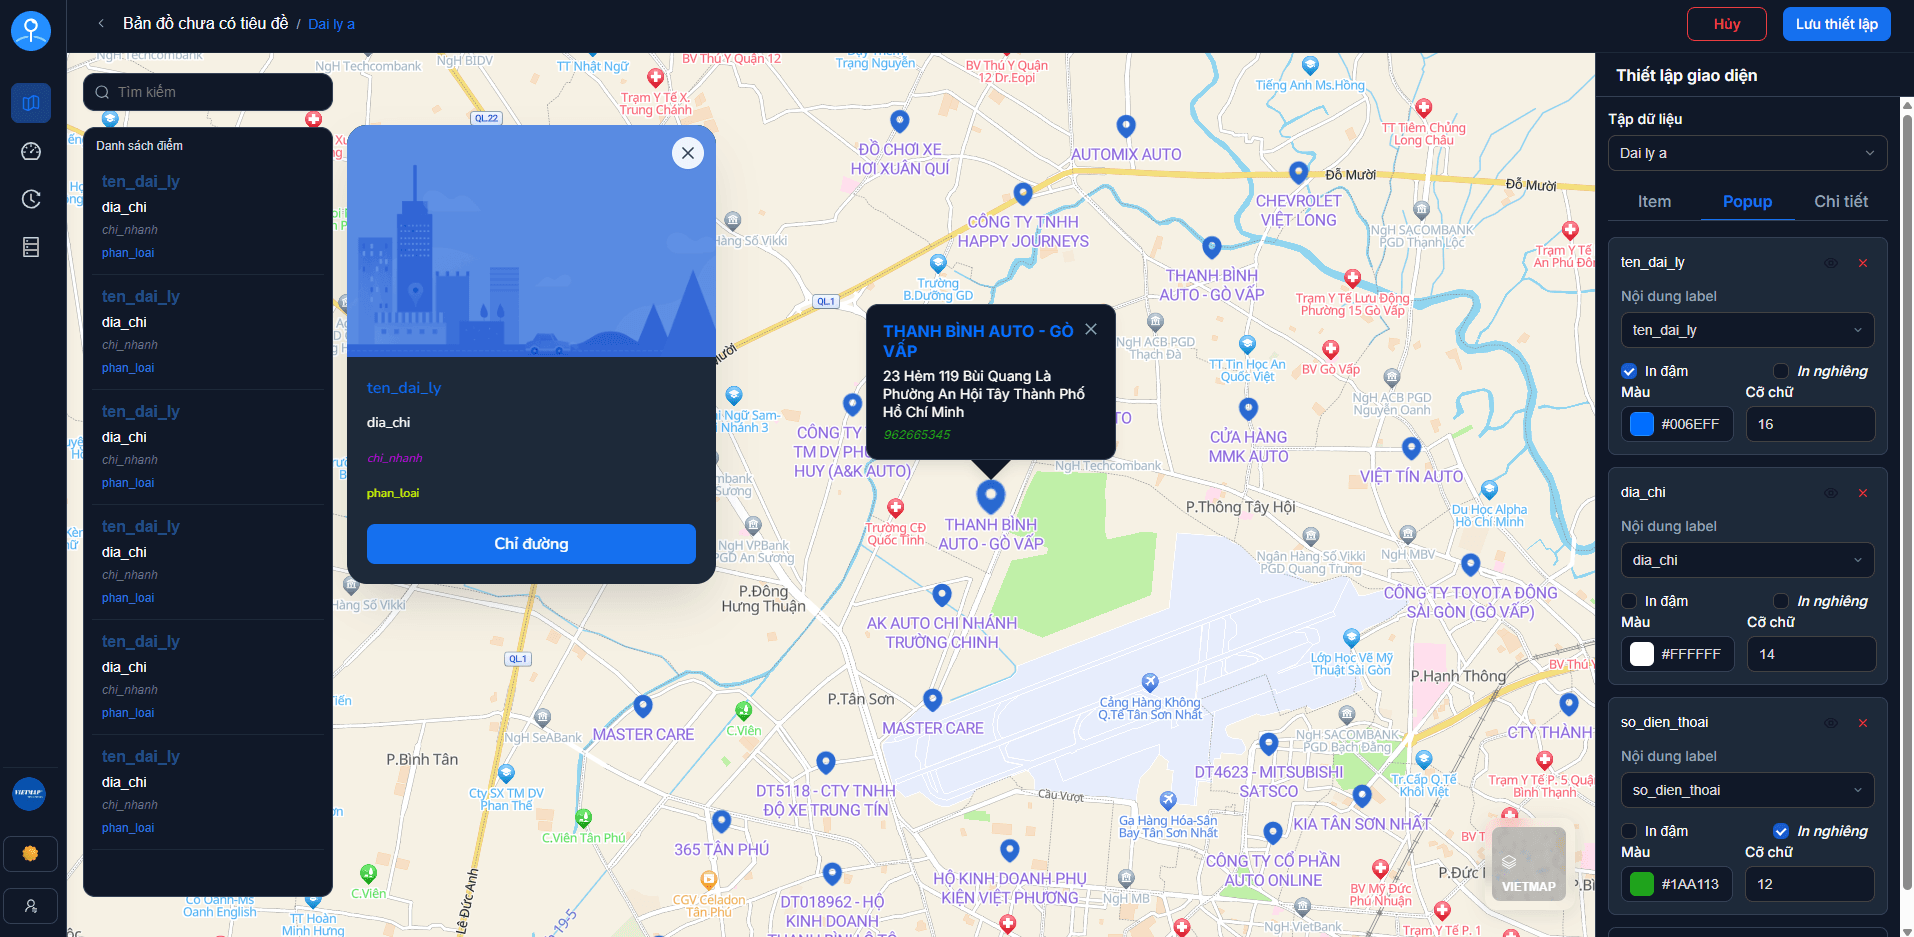
Up to 6 rows per tab
Once a tab has 6 rows, its Add row button greys out. The limit is per tab — the Detail tab still accepts rows when Item is full.
Show only what customers need
Customers usually only need the name, address, phone and opening hours. Internal columns (store codes, operational notes...) are better left hidden.
But mind two consequences before hiding something: the search box only covers the fields you display (Search & directions), and the Profile completeness metric uses the union of all three tabs as its denominator (Store analysis).
Publishing and getting the link
Once configured, share the map and copy the link.
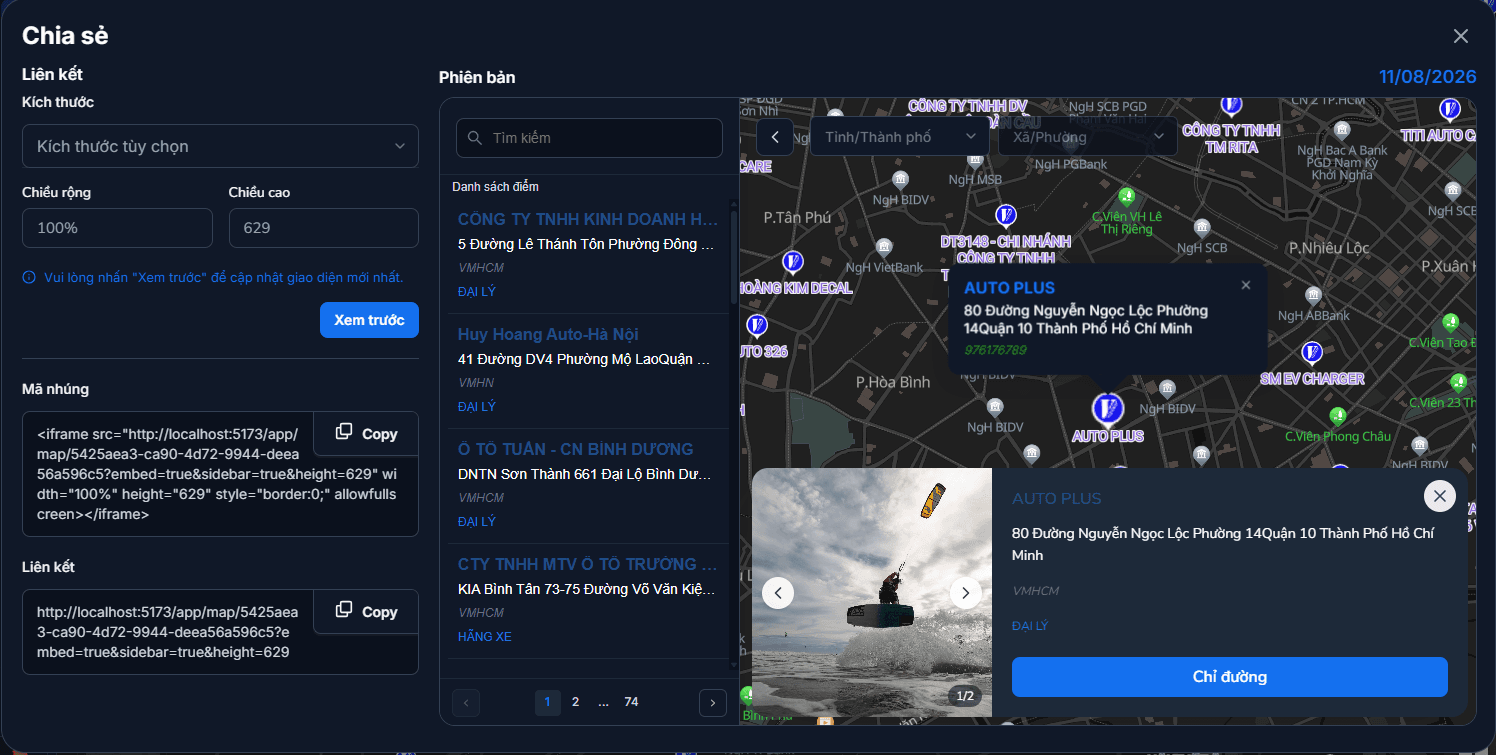
That link is ready to use: send it to customers, put it on your social page, or attach it to a "Find a store" button on your website.
The public map
This is what customers see when they open the link:
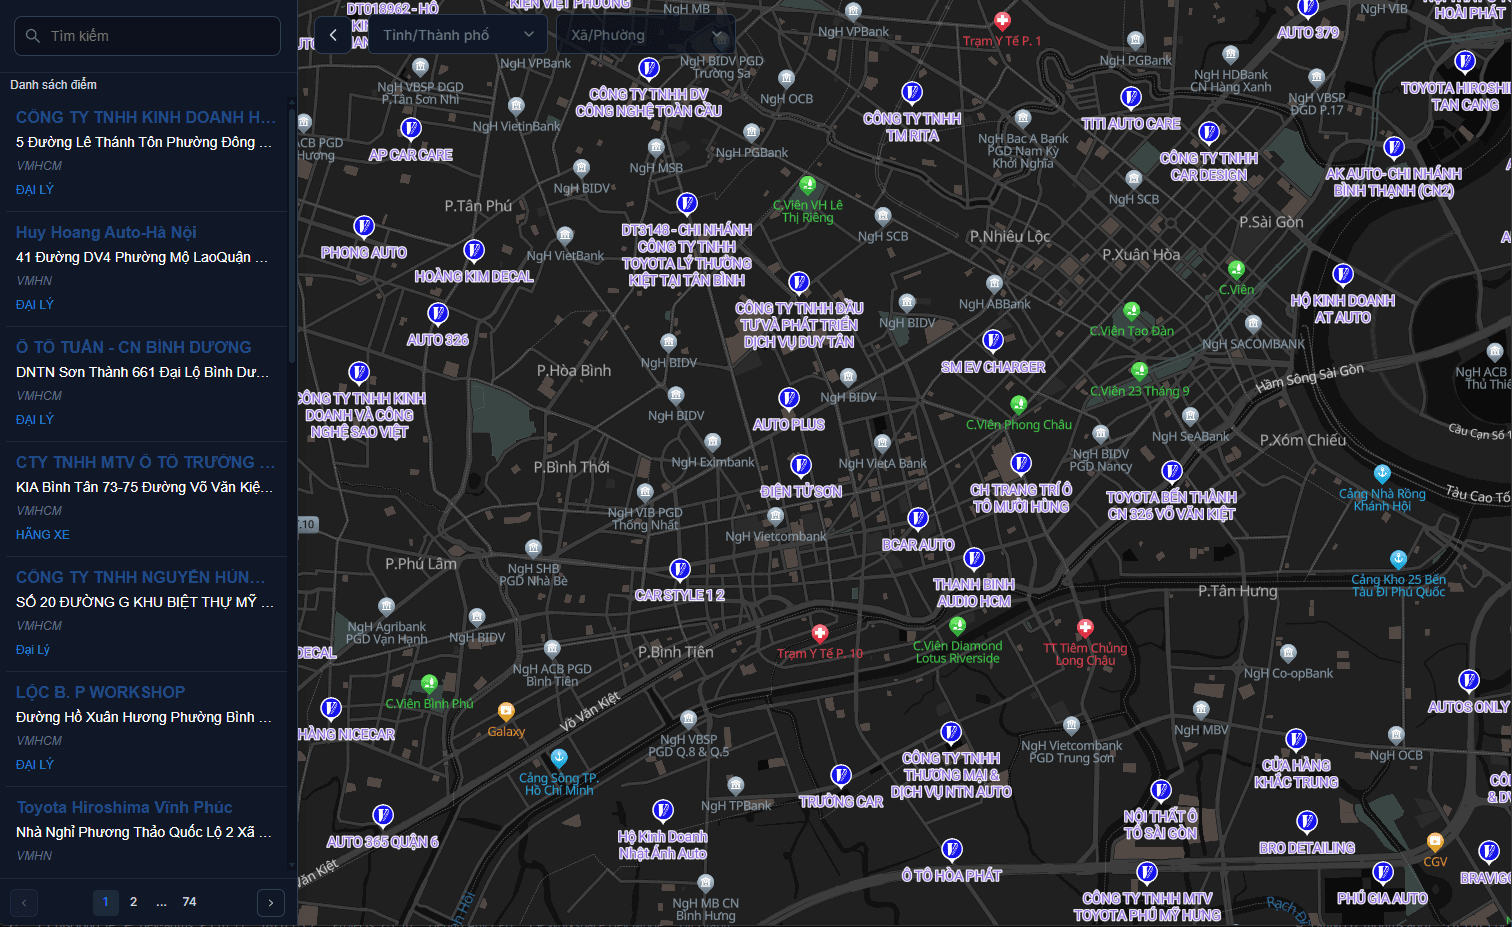
The public map shows exactly the fields you configured above — the list panel, the popup and the detail card all follow those settings.
Updating a published map
Data edits are live — only appearance changes need republishing
No republish needed when you change content: adding, editing or deleting stores, correcting an address or phone number, updating images and opening hours. The public map reads straight from your dataset, so clicking Save is enough.
Republish is required when you change appearance: icons, colours, labels, popup content, the basemap, adding or removing layers, or which fields are exposed to customers. Those are captured at publish time, so the public version keeps the older snapshot until you publish again.
Either way, the link you already shared stays the same — there is nothing to resend.
Deleting the map kills the link
If you delete a published map, the shared link and embed code stop working.
Next: Embedding into a website — put the map into your own web page with an iframe.