Managing data layers
Show, hide and reorder the data layers on your map.
A layer is a dataset you have uploaded, placed onto a map to be displayed. One map can hold several layers — a "Stores" layer and a "Dealers" layer, say — each with its own styling.
Dataset vs. layer
A dataset lives in your organization's shared library (see Managing data). When you put a dataset onto a particular map, it becomes a layer of that map. The same dataset can be used on many maps.
Adding a layer to a map
The Add data button sits at the bottom of the legend. Click it to bring data onto the current map.
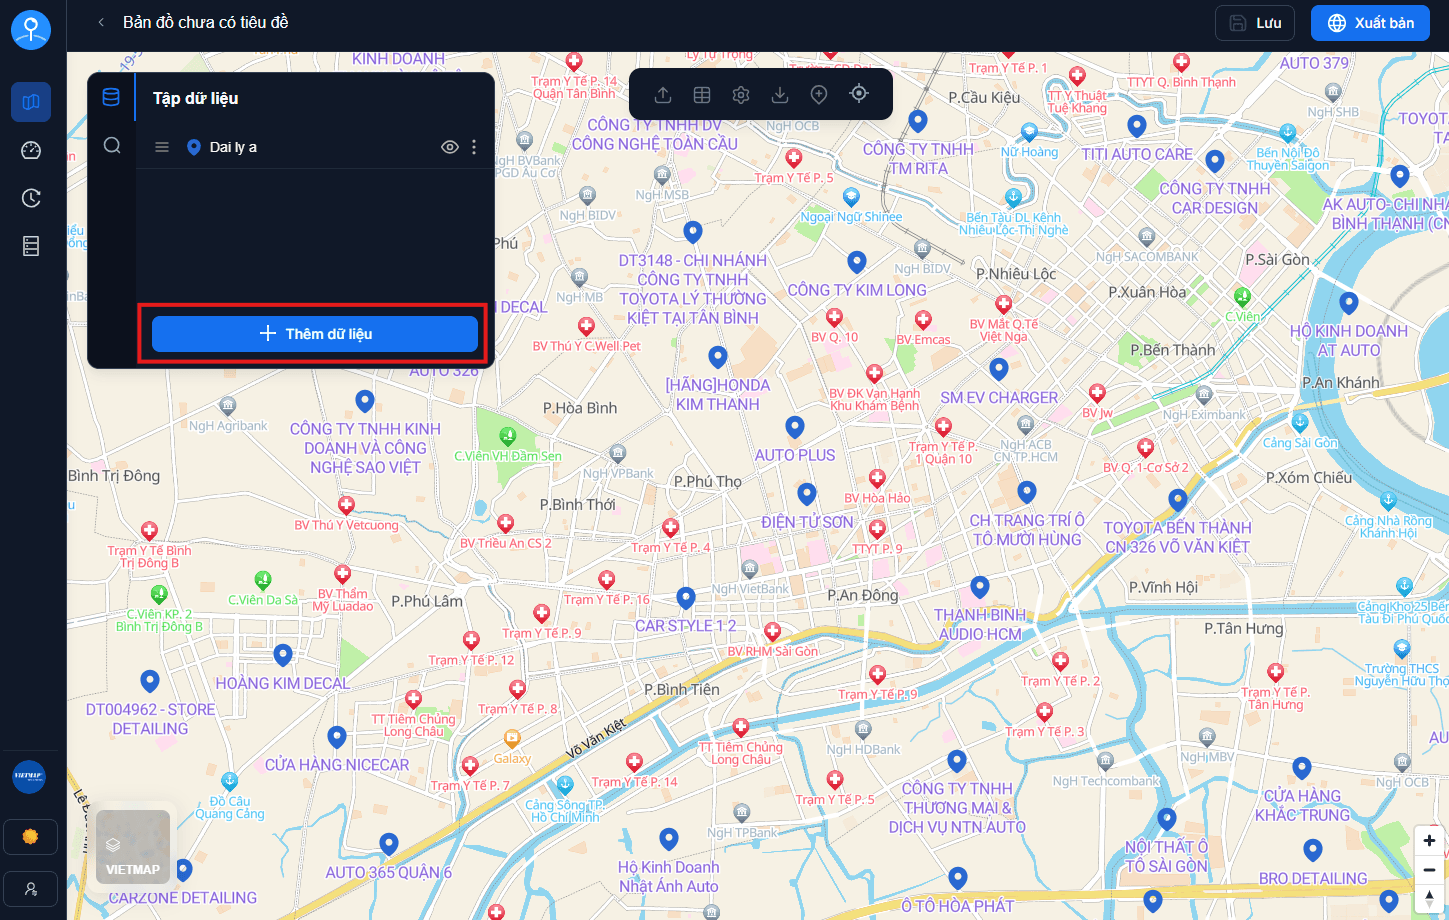
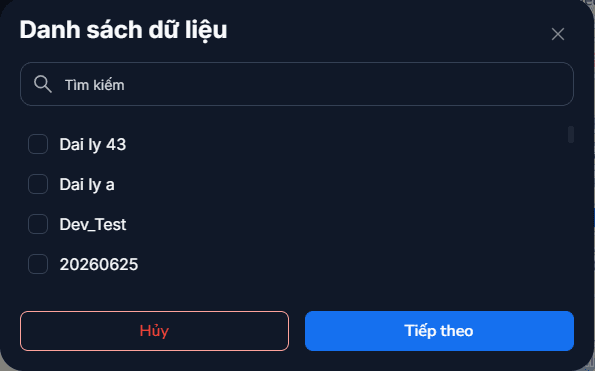
The system lists the available datasets. Select one or several at once, then confirm.
This button is not on the floating toolbar
The floating toolbar at the top-centre of the map only has Upload · Data · Settings · Export · Add point · Spatial query. Upload there brings a new file into the system, which is different from Add data in the legend — that one picks from datasets you already have.
After adding a layer
The new layer is drawn on the map with default styling and gets its own row in the legend.
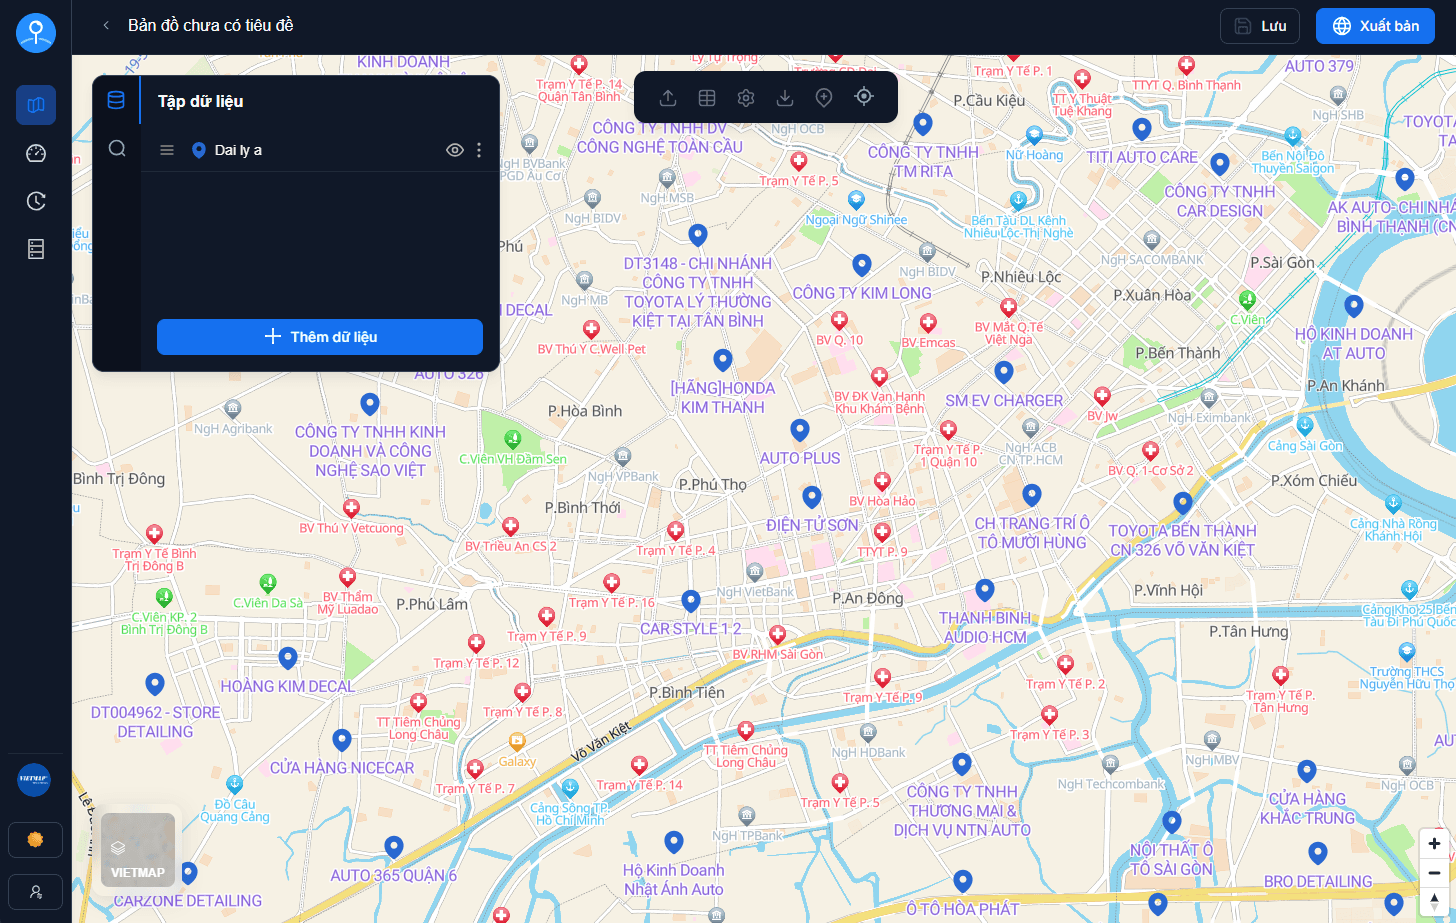
From here you can:
- Change the icon and colours to match your brand → Display customization.
- Hide / show the layer with the eye icon → Legend.
- Add, edit and delete stores in the layer → Managing stores.
Removing a layer from a map
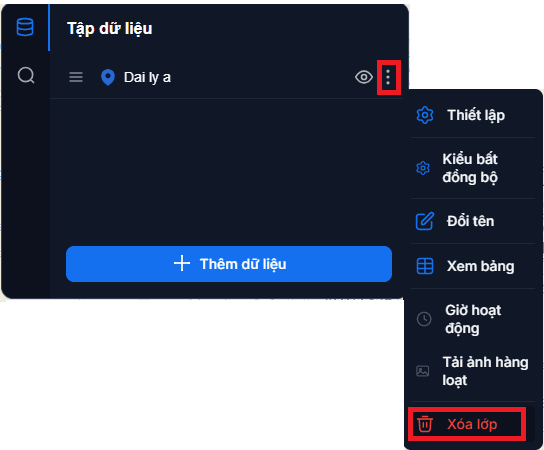
Open the three-dot menu next to the layer in the legend and choose Delete layer.
Removing a layer does not delete the source data
This only takes the layer off the current map. The dataset stays in the system and you can add it back here or to any other map. To delete the data from the system entirely, see Managing data.
Remember to save and publish again
After adding or removing a layer, click Save. If the map is already public, you also need to publish again before customers see the change.
Next: Managing stores — add, edit and reposition stores directly on the map.