Uploading files
Bring store data into Store Directory from an Excel or CSV file.
Once your data is prepared in the right format, pushing your whole store list into the system takes only a few clicks. Uploaded data becomes a dataset you can use on any map.
Supported formats
| Format | Requirements |
|---|---|
| CSV | Must have two coordinate columns (latitude, longitude). Any other columns are up to you. |
| Shapefile (SHP) | Pack the whole file set (.shp, .shx, .dbf, .prj) into a single .zip and upload that. |
| GeoJSON, KML, GPKG, GML | Upload directly — coordinates are already inside the file. |
| Google Sheet | No file needed — paste the spreadsheet link, pick a sheet, then pick the two coordinate columns. |
Using Excel?
Export to a CSV UTF-8 file and upload that. See Preparing your data for details. Google Sheets is different — use the link directly, no export needed.
Where to open the upload dialog
There are three entry points, all opening the same dialog:
| Entry point | Use it when |
|---|---|
| Data management → Datasets, the Upload button at the top of the left column | The main route — get data into the library first, then use it on any map |
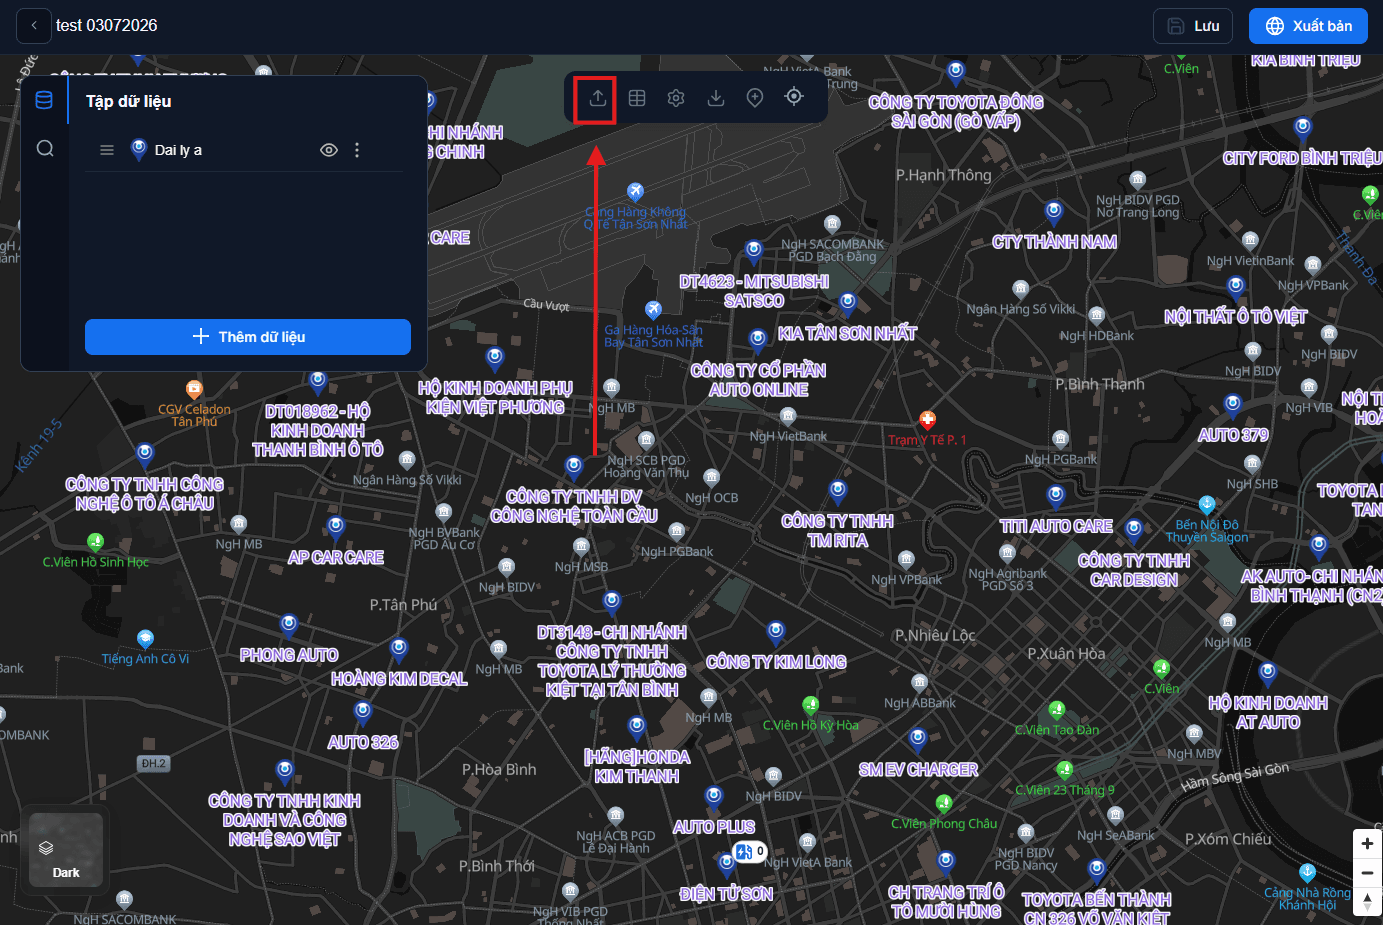
| In the map editor, the Upload button on the floating toolbar at the top-centre of the map | You are building a map and want to add data without leaving |
| Step 1 of the create-map dialog | You have no data yet and want to create a map right away |
Upload steps
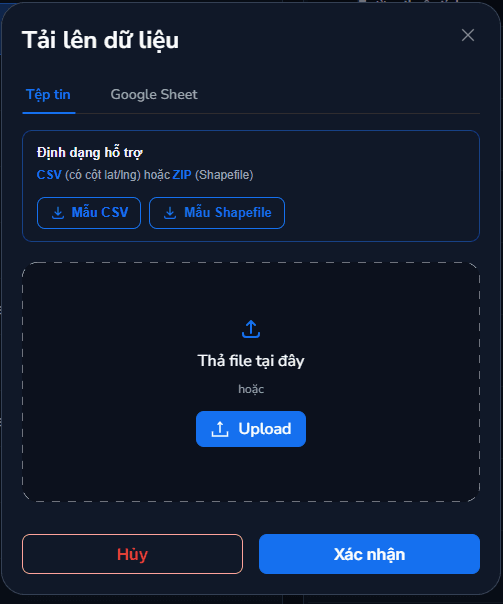
1. Choose the data type and the file
Pick the format matching your file, then confirm to start the upload.
2. For CSV files: point out the coordinate columns
This is the most important step for CSV. Click settings, then choose which column is latitude and which is longitude. Confirm to start uploading.
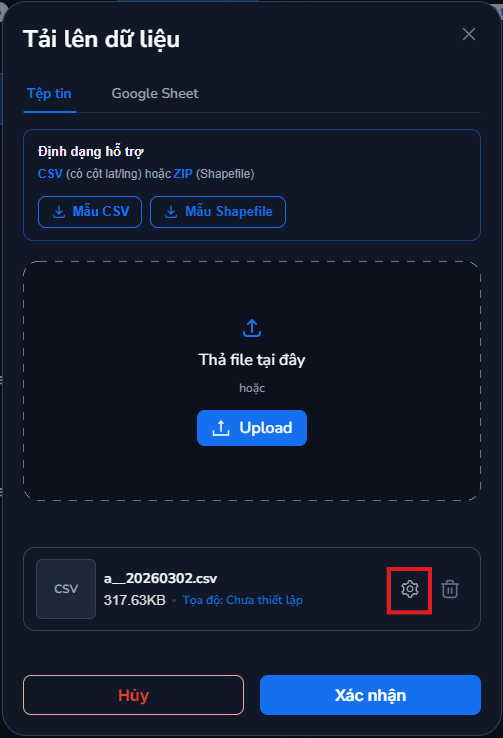
Pick the wrong column and every store lands in the wrong place
Swapping Longitude ↔ Latitude sends all your stores out to sea or into another country. If positions look wrong, check this step first.
For GeoJSON, KML, GPKG, GML and Shapefile, coordinates are already in the file, so this step is skipped.
Not sure your file is formatted correctly?
The dialog offers two sample file downloads: CSV sample and Shapefile sample. Opening one to compare is the fastest check.
Uploading from Google Sheets
Switch to the Google Sheet tab in the same dialog, then:
- Paste the spreadsheet URL.
- Choose the sheet to read from.
- Choose the latitude column and the longitude column.
You must grant the system view access
A private spreadsheet cannot be read. When that happens the dialog shows a service account address — share the spreadsheet with that address as a Viewer and try again.
Uploading from inside the map editor
You can also upload while building a map. The steps are identical.
After uploading
The new dataset appears under Datasets. What to do next:
Next: Managing data — rename, delete and organise your datasets.